Uploading Supporting Documents to Auxita
During the enrolment process, if there are any supporting documents for the Healthcare Provider to review or even sign, you can upload these documents to Auxita and prompt for signature.
The patient must already be enroled in a Patient Support Program before you can upload any documents to their profile.
Uploading Documents from the Programs Page
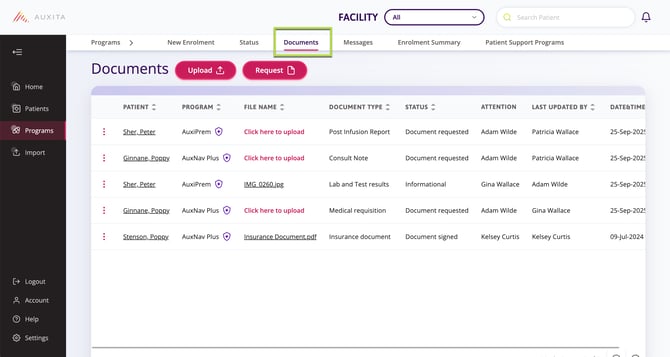
- Click on the Programs section from the navigation pane on the left-hand side.
- Select the Documents tab along the top to jump to that section.
- Click the Upload button to begin uploading a document.

- Complete the required details on the Document Upload page, including Patient, Program, and Document Type.
- The Attention field also allows you to choose who you want to send the document to; however, this field is not required. By default, all Auxita users in the facility will receive the Document if you do not choose a user.
- Browse to select the file on your computer to attach it.
- The File Name automatically populates based on the attachment name, but can be edited if desired.
- Choose the Action:
- Informational
- Request Signature
![]() TIP It is recommended to always use the Attention field to assign a document directly to a user. Users can opt into Immediate Notifications for Documents that have been sent directly to them.
TIP It is recommended to always use the Attention field to assign a document directly to a user. Users can opt into Immediate Notifications for Documents that have been sent directly to them.
![]() NOTE Physicians and their office staff can send documents to any other user that is part of their Facility, including PSP Staff for the Program the selected Patient is enrolled in.
NOTE Physicians and their office staff can send documents to any other user that is part of their Facility, including PSP Staff for the Program the selected Patient is enrolled in.
PSP Staff can also send documents to patients. All Auxita users will be able to view these patient documents. Through Auxita, only the PSP Staff can communicate directly with the Patient.

![]() NOTE In the scenario of working from multiple facilities, using the facility filter will still allow the upload of documents from patients if the dropdown is set to All.
NOTE In the scenario of working from multiple facilities, using the facility filter will still allow the upload of documents from patients if the dropdown is set to All.
The patient search displays all patients across facilities, but once you select a patient, only users who work from the facility appear in the Attention dropdown.

Informational Documents
Click Submit for Informational documents.
If you have selected a user next to Attention, that user will receive an Auxita notification based on their preferences set.
Documents that Require Signature
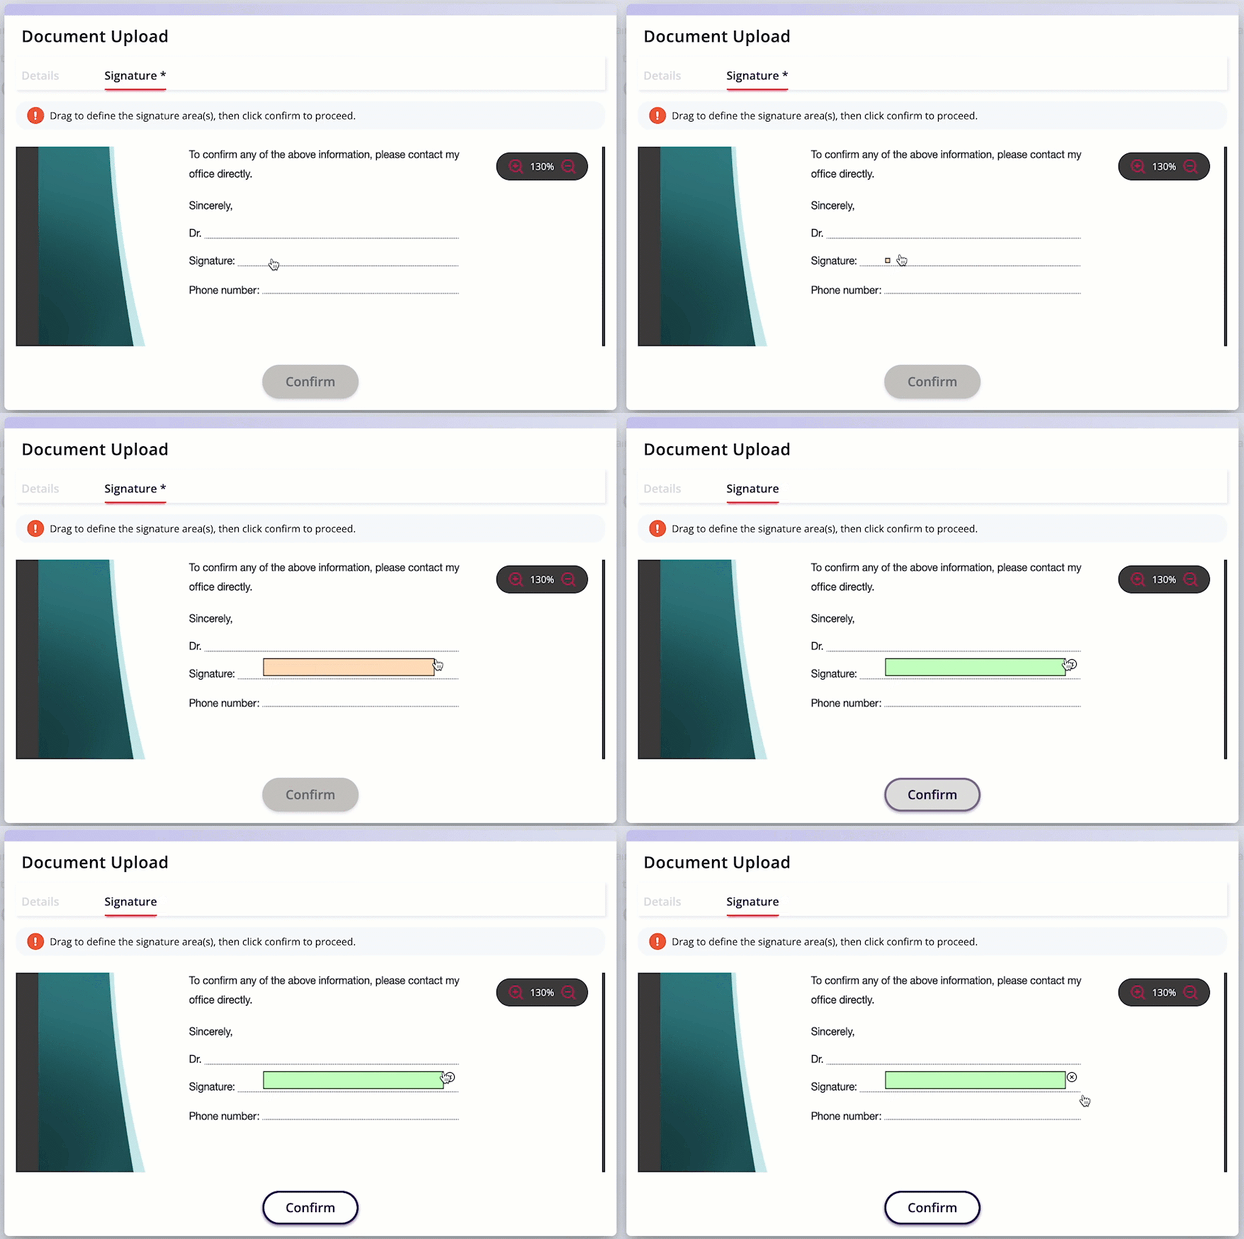
If you have selected Request Signature as an action. Click into the Signature tab to define the area to sign.
You can apply more than one signature box to the document, but they cannot overlap.
After drawing the signature area, 2 boxes appear. One for the signature, and the other for the date. To position the date field, use the arrows.
Then, use the dropdown to choose the date format.

Click Confirm once you’ve indicated where the document should be signed, then click Submit.
![]() NOTE You can only request signatures on PDF Documents. Any other types of documents do not support signatures and can be Informational only.
NOTE You can only request signatures on PDF Documents. Any other types of documents do not support signatures and can be Informational only.
If the Action is set to Request Signature, the Attention field becomes a required field.
Supported Document Types
![]() NOTE The following document types are supported for upload, and the file size limit must be < 6 MB.
NOTE The following document types are supported for upload, and the file size limit must be < 6 MB.
- Word
- JPEG