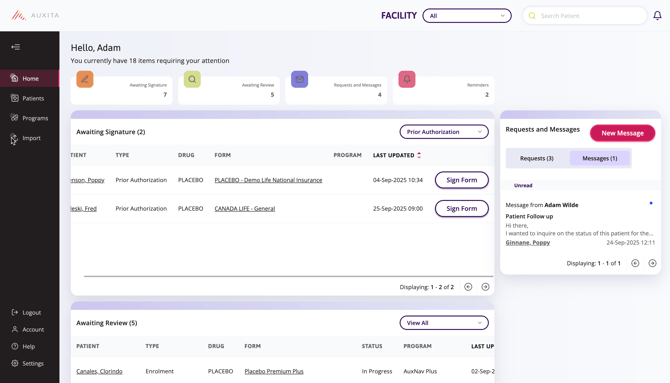
Prior Authorizations can be reviewed and signed from three areas of the platform: the Home Dashboard, the Programs Section, and the Patient’s Program Details.
On the Home Dashboard
- Navigate to the Awaiting Signature Section.
- From the View All dropdown, choose Prior Authorization to see any pending forms.
- Click Sign Form or Review and Sign to open, review, and sign the document.
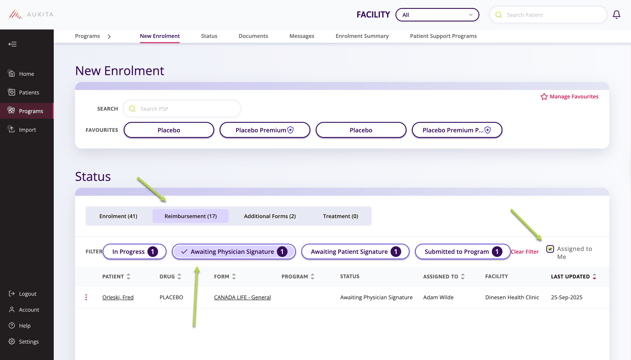
In the Programs Section
- Scroll to the Status Table.
- Under Reimbursement, filter by Awaiting Signatures, and then select the Assigned to Me checkbox. This will display all Prior Authorizations requiring your signature.
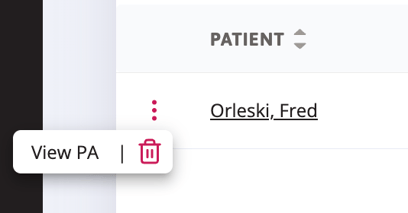
- Open or delete a form by clicking its underlined name or by selecting the ellipsis next to it and choosing View PA.
- After reviewing, sign the form and either Send for Patient Signature or Submit.
From the Patient's Program Details
- Open the patient's profile and scroll to the Programs Overview.
- Locate the Prior Authorizations tile and click the underlined form name.
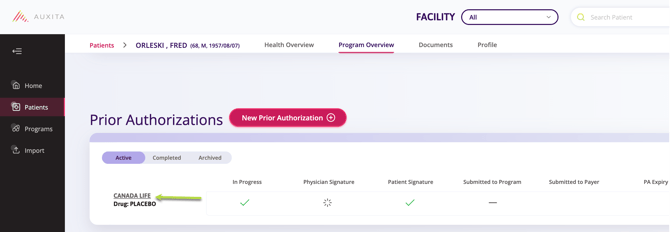
- The existing form will open for review and signature.
![]() NOTE For more information on how to review and sign, please check out the following article: Saving your Signature
NOTE For more information on how to review and sign, please check out the following article: Saving your Signature
![]() NOTE Patient consent may also be collected while completing a Prior Authorization form, either in person, by email, or via SMS.
NOTE Patient consent may also be collected while completing a Prior Authorization form, either in person, by email, or via SMS.
For step-by-step instructions on capturing patient consent in person, see: How to Capture Patient Consent in Office