How to Import a list of Pharmacies to Auxita from your EMR
Any user who is a Facility Admin can import a Pharmacy List to pre-populate the Pharmacy Address Book. If you already have a Pharmacy List in your EMR, many systems allow you to export this as a CSV for import into other applications, like Auxita.
*You must be a Facility Admin to access this feature.
For instructions on exporting a pharmacy list from Accuro, please check out Accuro’s support page: Accuro - Export Address Book
![]() NOTE A CSV file (comma-separated value) is a delimited text file that uses a comma to separate each value. Most commonly, this file type would be created in Excel and saved specifically as a .CSV
NOTE A CSV file (comma-separated value) is a delimited text file that uses a comma to separate each value. Most commonly, this file type would be created in Excel and saved specifically as a .CSV
Export your patient data from your EMR and save it in a CSV format in a secure folder on your computer.
- Once logged in to Auxita, from the left-side menu, click on Import.
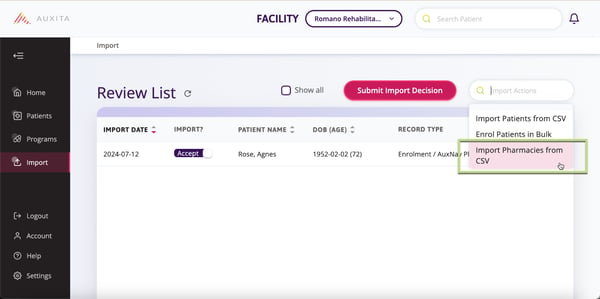
- To start your import, click the Import Actions button. Then choose Import Pharmacies from CSV.

- An Acknowledge Import dialogue box will display to provide consent.
- Check off Show advanced mapping options.
- Click OK.

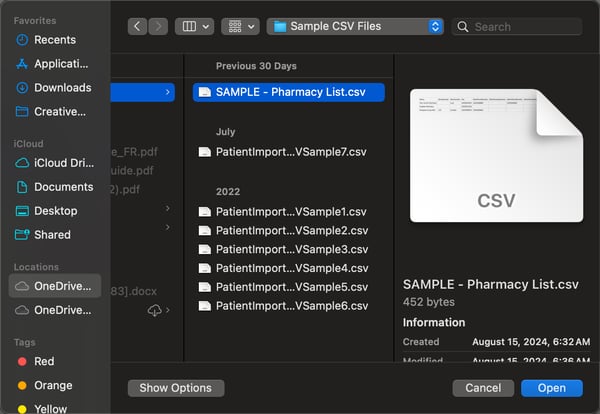
- Browse to the .csv file on your device. Select the file and click Open, and the import to Auxita will commence.

- The Mapping Columns window displays whether the advanced mapping was selected. Here, you can match the column header from your CSV file to the Auxita field where the data is imported.
For example, if your CSV File indicates Phone Number and Fax Number for the columns with contact numbers, you’ll want to match those to the Auxita Fields MainPhoneNumber and Fax, respectively. - Any CSV column header that does not match identically to the Auxita Field shows up pink until you choose the appropriate Auxita Field from the dropdown.
You can see a preview of the data in your file on the far right of the window to help you identify where it should go in Auxita. - Continue to select the appropriate Auxita fields for all of your CSV column headers. Auxita Fields with an asterisk are Required.
- Once you are done with the mapping, click Import.
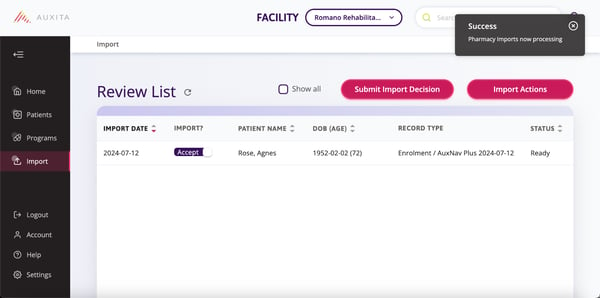
- A Success dialogue box appears while the upload is processing.

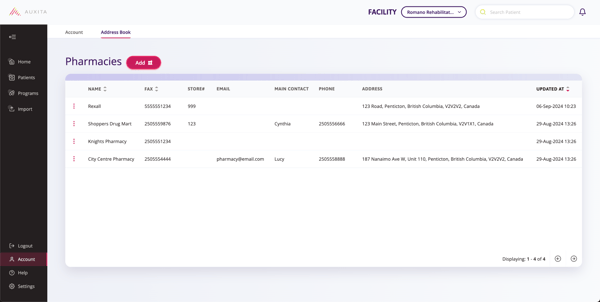
- The successful records can be viewed from the Accounts page under the Address Book tab. You will not see the records in the Review List on the Import page.

![]() NOTE The CSV file should be under 2MB (about 1000 records). Required fields are Pharmacy Name and Fax Number.
NOTE The CSV file should be under 2MB (about 1000 records). Required fields are Pharmacy Name and Fax Number.
Download a template CSV File here