Health Overview: Adding, Editing or Deleting Measurements
Physicians and their Office Staff can manually add and edit measurements within the Patient’s Health Overview to keep an up-to-date record of their patient’s current health status.
![]() NOTE For users with EMR integrations, many measurement values are automatically synced from your EMR to ensure Auxita contains the latest patient data.
NOTE For users with EMR integrations, many measurement values are automatically synced from your EMR to ensure Auxita contains the latest patient data.
If EMR integration is not available, you can manually add measurements directly to Auxita.
Jump to each section below
Adding Measurements
Each tile offers a detailed snapshot of the patient’s health status with several measurements grouped by therapeutic area. If any value is empty, and you wish to keep a record in Auxita, you can manually add values within the Health Overview.
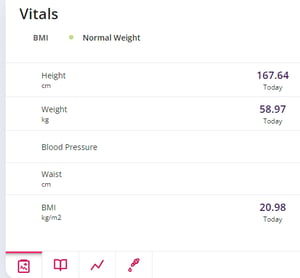
- Click the Add Measurement button from the Health Overview section under the patient's profile.

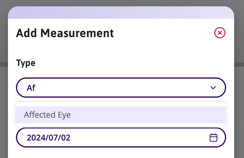
- Select the type of measurement by searching or scrolling through the list of available options, then enter the Value and Date, if different than today.
- Once all details are confirmed, click Add.
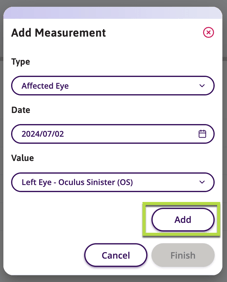
- You can continue to add more measurements from this window or click the Finish button to finalize.
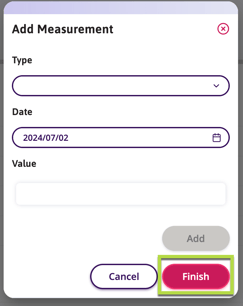
![]() NOTE When adding multiple measurements, repeat the above steps. Select Finish upon completion. The Finish button will only be available after at least one measurement has been added.
NOTE When adding multiple measurements, repeat the above steps. Select Finish upon completion. The Finish button will only be available after at least one measurement has been added.
Editing Measurements
In the event that a measurement was added incorrectly, you can edit the value and/or the date if required.
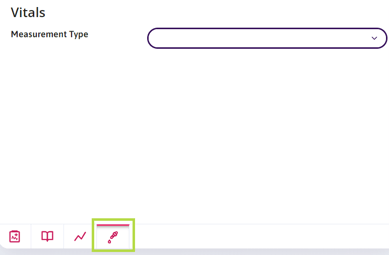
- Select the Measurements Tab at the bottom of the tile.
- Use the dropdown to choose the measurement you wish to edit.
- If there are values for the selected Measurement, under the ACTIONS column, you can edit by clicking the pencil icon.

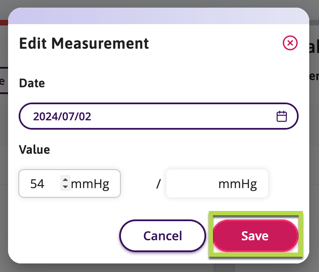
- Enter the correct Date and/or Value then click Save.
Deleting Measurements
A measurement can be deleted if necessary.
![]() NOTE You cannot recover a deleted measurement.
NOTE You cannot recover a deleted measurement.
- From the Measurements Tab at the bottom of the tile, use the Measurement Type dropdown to choose the measurement you wish to delete.
- If there are values for the selected measurement under the ACTIONS column, you can delete the measurement by clicking the trash can icon.
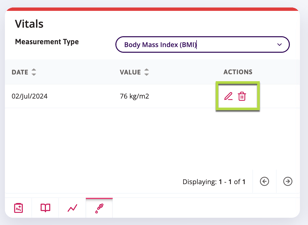
- Confirm you are certain you want to delete the measurement before clicking the Delete button.

![]() NOTE You will not be able to edit or delete Measurement values that came from an EMR Integration.
NOTE You will not be able to edit or delete Measurement values that came from an EMR Integration.